How to Create a Waste Stream
Easily create waste streams requiring approval (profiled) or a non-profiled waste stream to be added to a non-hazardous manifest.
Written by Ryan Battles
Updated on Sep 23, 2024
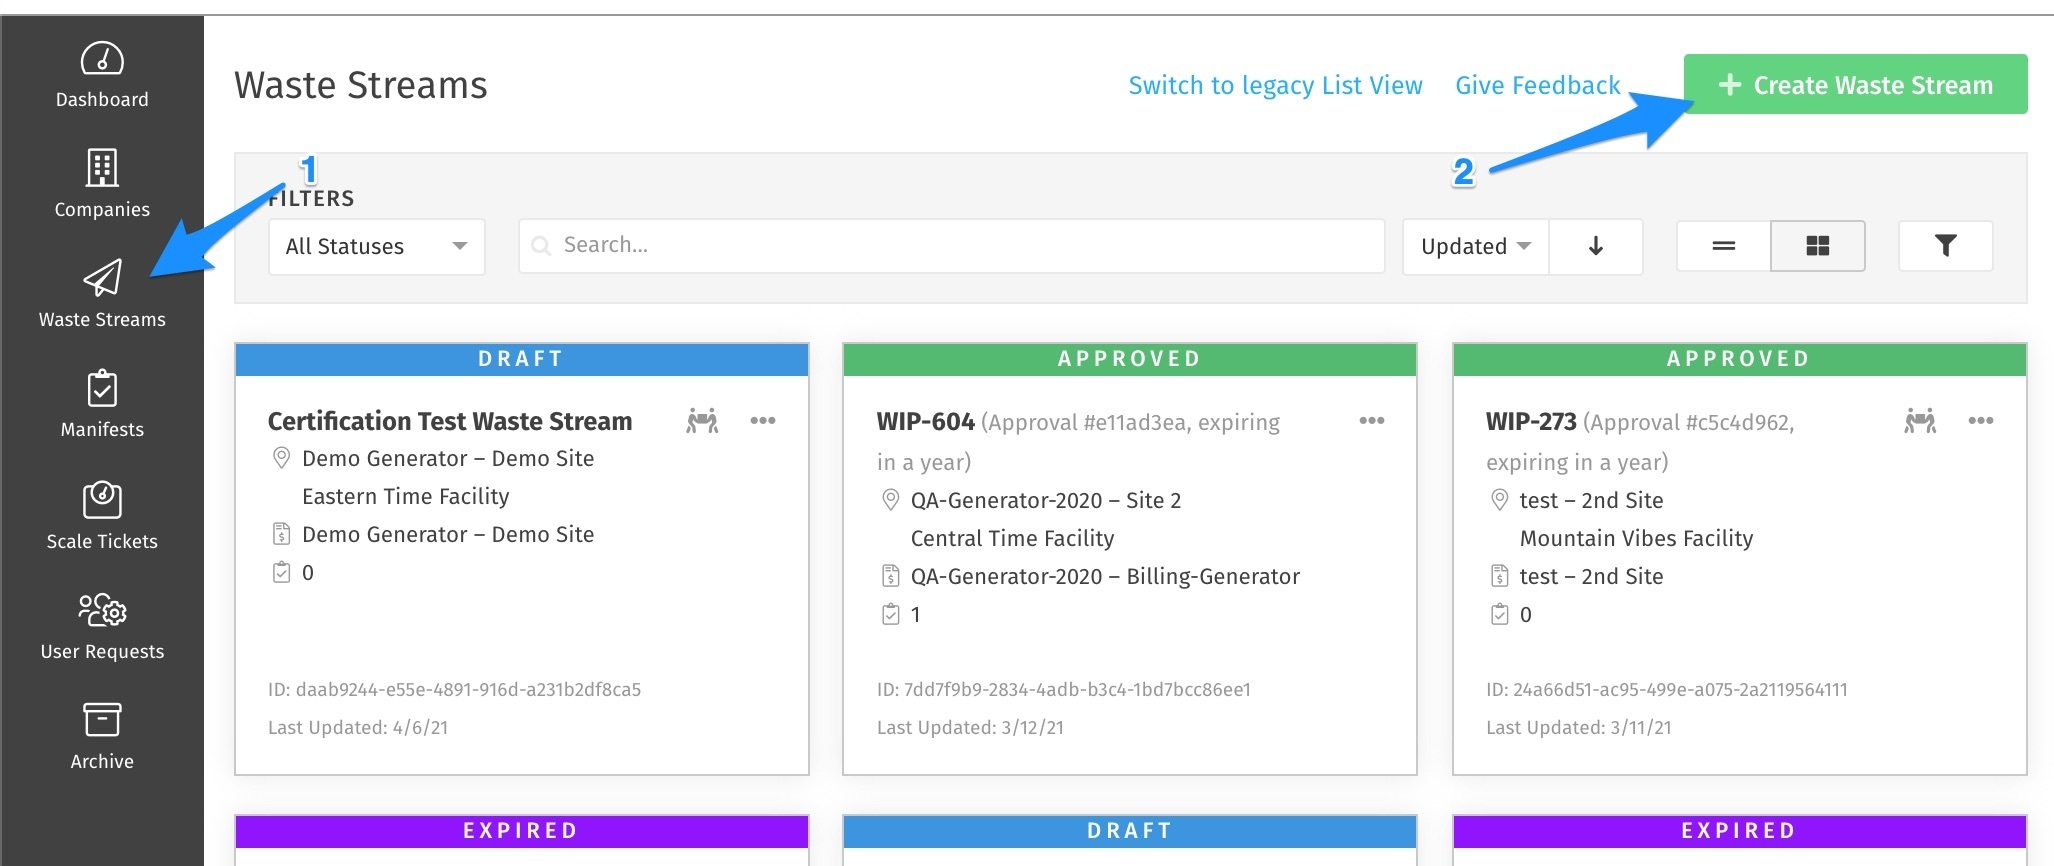
Click Create Waste Stream
In order to create a new Waste Stream, you must navigate to Waste Streams in the sidebar, then click Create Waste Stream.
Select the Facility and Waste Type
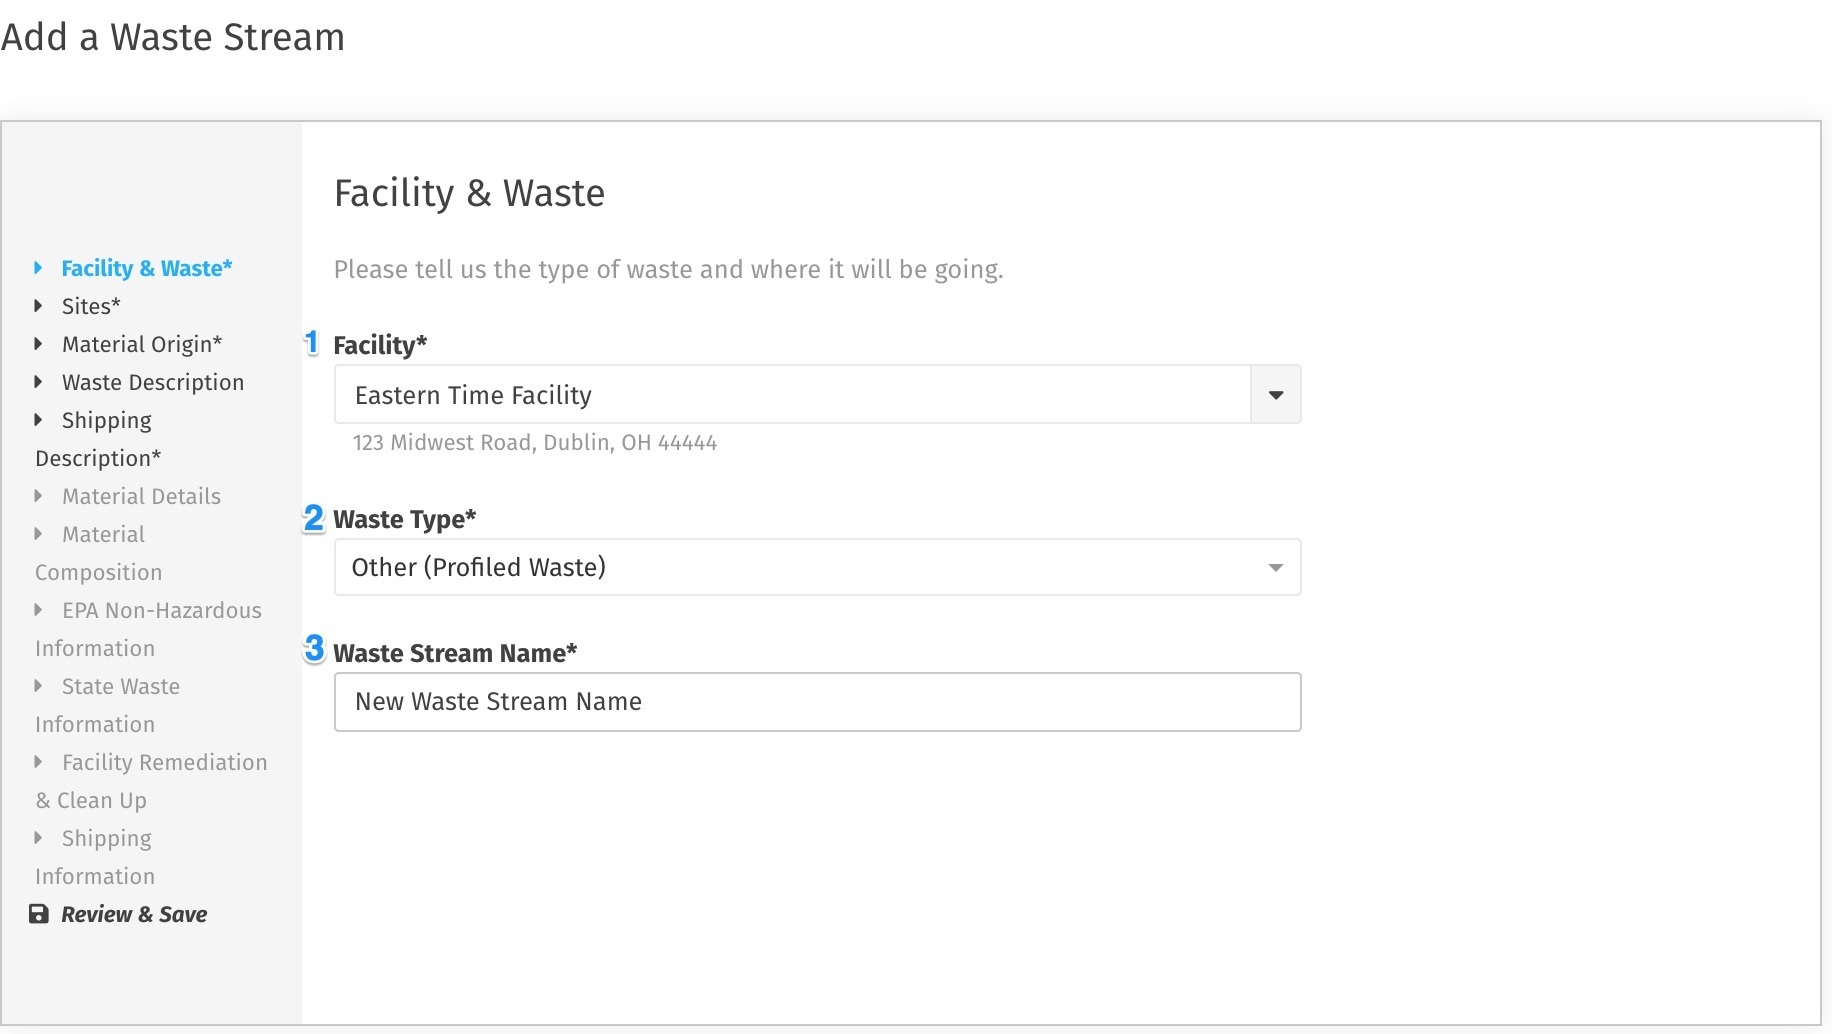
(1) Select the Destination Facility Site for your waste.
(2) Select what type of Waste you are submitting. What is available in this list may vary based on what is available in your Portal as well as what Facility you have selected.
(3) Give a name to your Waste Stream. This will be something that you can use to search for in the list view.
Add the other Companies to the Waste Stream
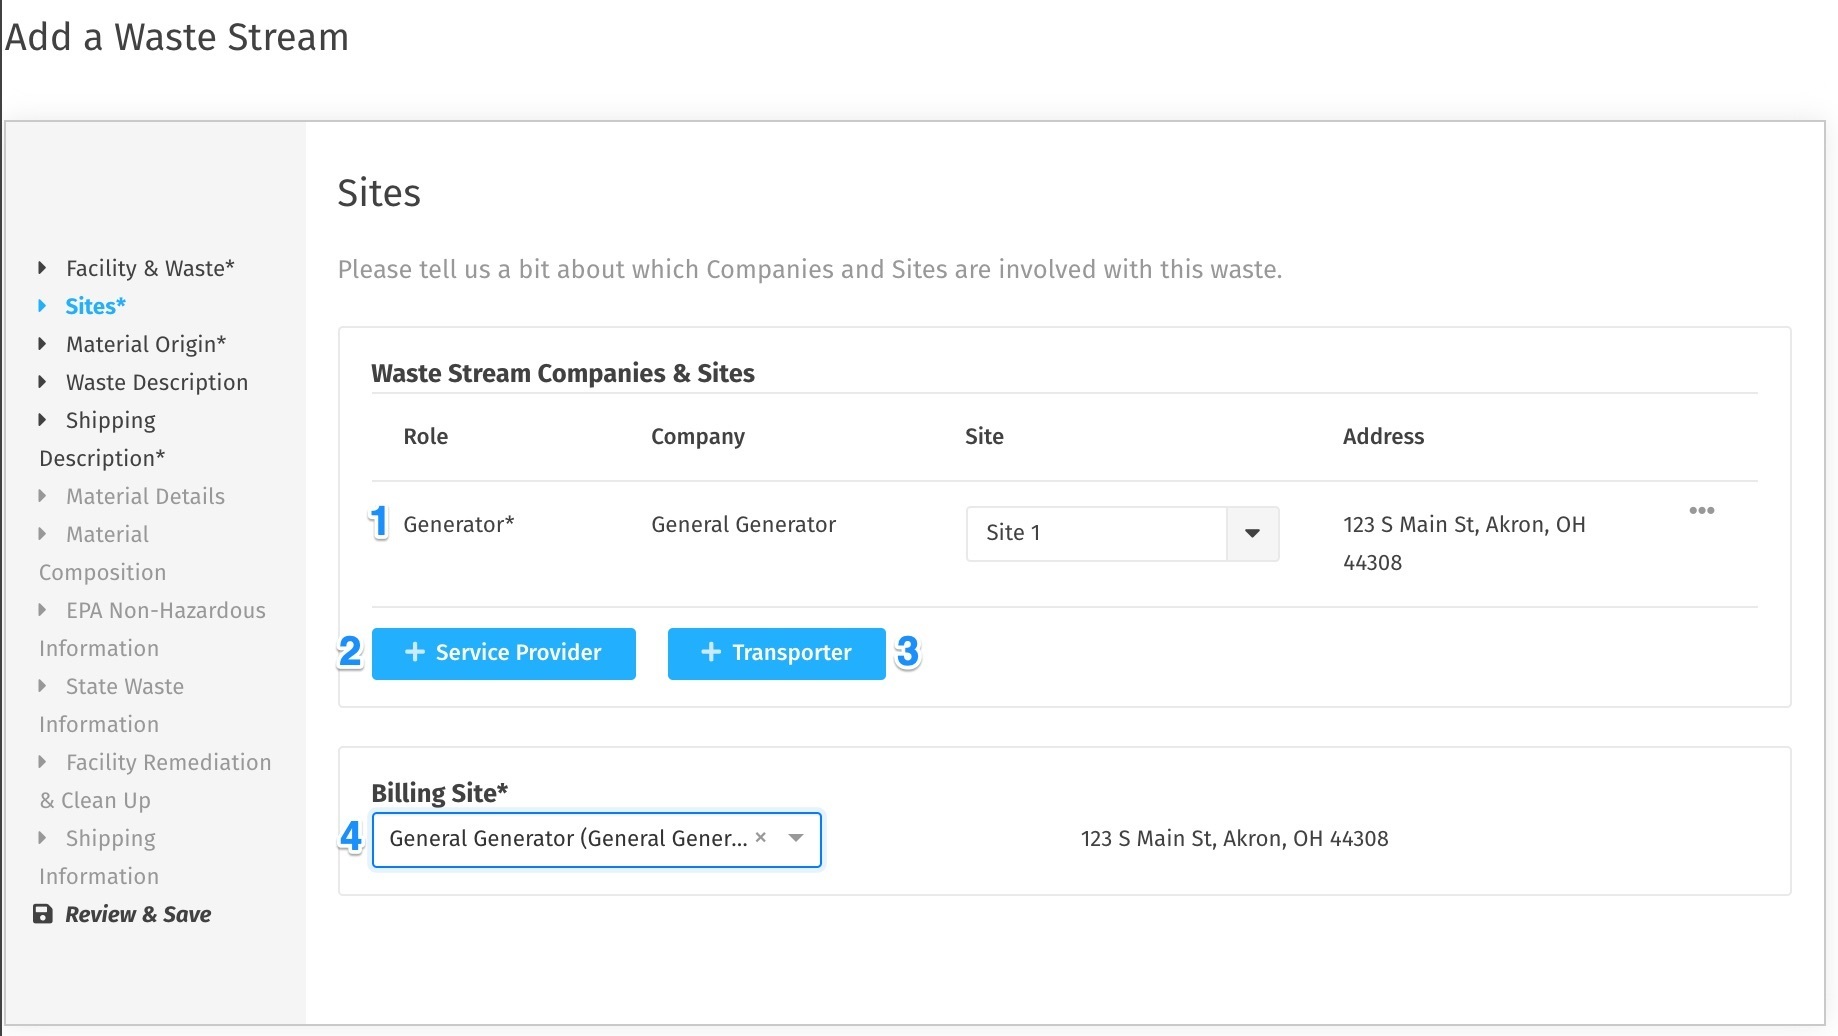
(1) Generator Company and Site
Depending on your User type and your Company's settings, the Generator Company and Site may already be pre-filled. Otherwise you can select from the options in the list.
Note: If you are a Service Provider and aren't authorized to the Client that you need to add to the Waste Stream, you can create a Draft without the Generator selected. You will need to request authorization to the client and add them to be able to submit the Waste Stream for approval.
(2) Service Providers
If you are a Service Provider... You will automatically be added to the Waste Stream you're creating (unless your company is multi-type). If you're working with another Service Provider, you may add them by clicking the Service Provider button and selecting them from a list of all Service Providers within the Portal.
If you are a Generator or Facility user... Click on the Service Provider button to add up to two Service Providers to a Waste Stream. Service Providers that have already been authorized to create Waste Streams on the Generator's behalf will be indicated, but you can also choose to add any Service Provider in the Portal to a Waste Stream individually.
(3) Transporter
The Transporter field can be used to document preferred or authorized Transporters for a particular Waste Stream. Users in the Transporter Companies that you add will not have access the Waste Stream, so feel free to add as many as you need.
(4) Billing Site
The Billing Site selection will include all Generator and Service Provider Sites you have added to the Waste Stream for you to select the appropriate one.
Note: Some Portals may select the Billing Site for you, and you can skip this step.
If your Company or Site isn't in the list...
Here are some additional guides that will assist you if the Companies and Sites you wish to add to the Waste Stream do not already exist:
- How to Create a New Customer Company
- How to Create a Company Site
- Requesting Access to a Generator Company (For Service Providers)
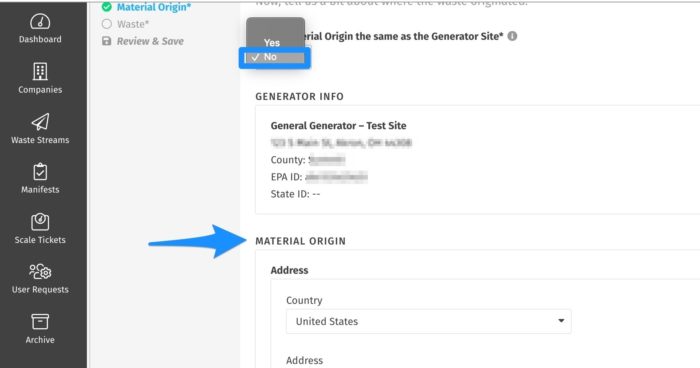
Set the Material Origin
If the Material Origin information is the same as the Generator Site (displayed in the box below) simply select Yes and the information will be automatically filled.
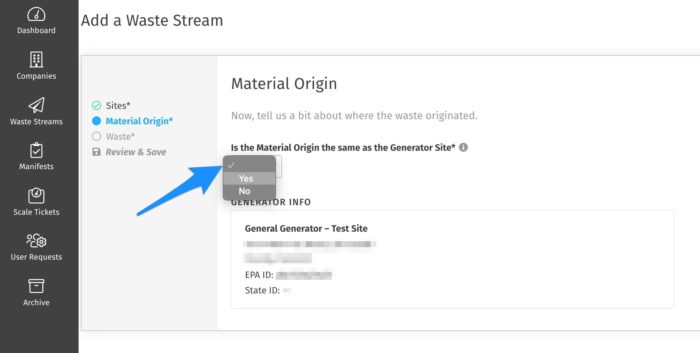
If the Material Origin information is different than the Generator Site address, select No and you'll be able to type in the information one-time for this Waste Stream only (a new Generator Site will not be created).
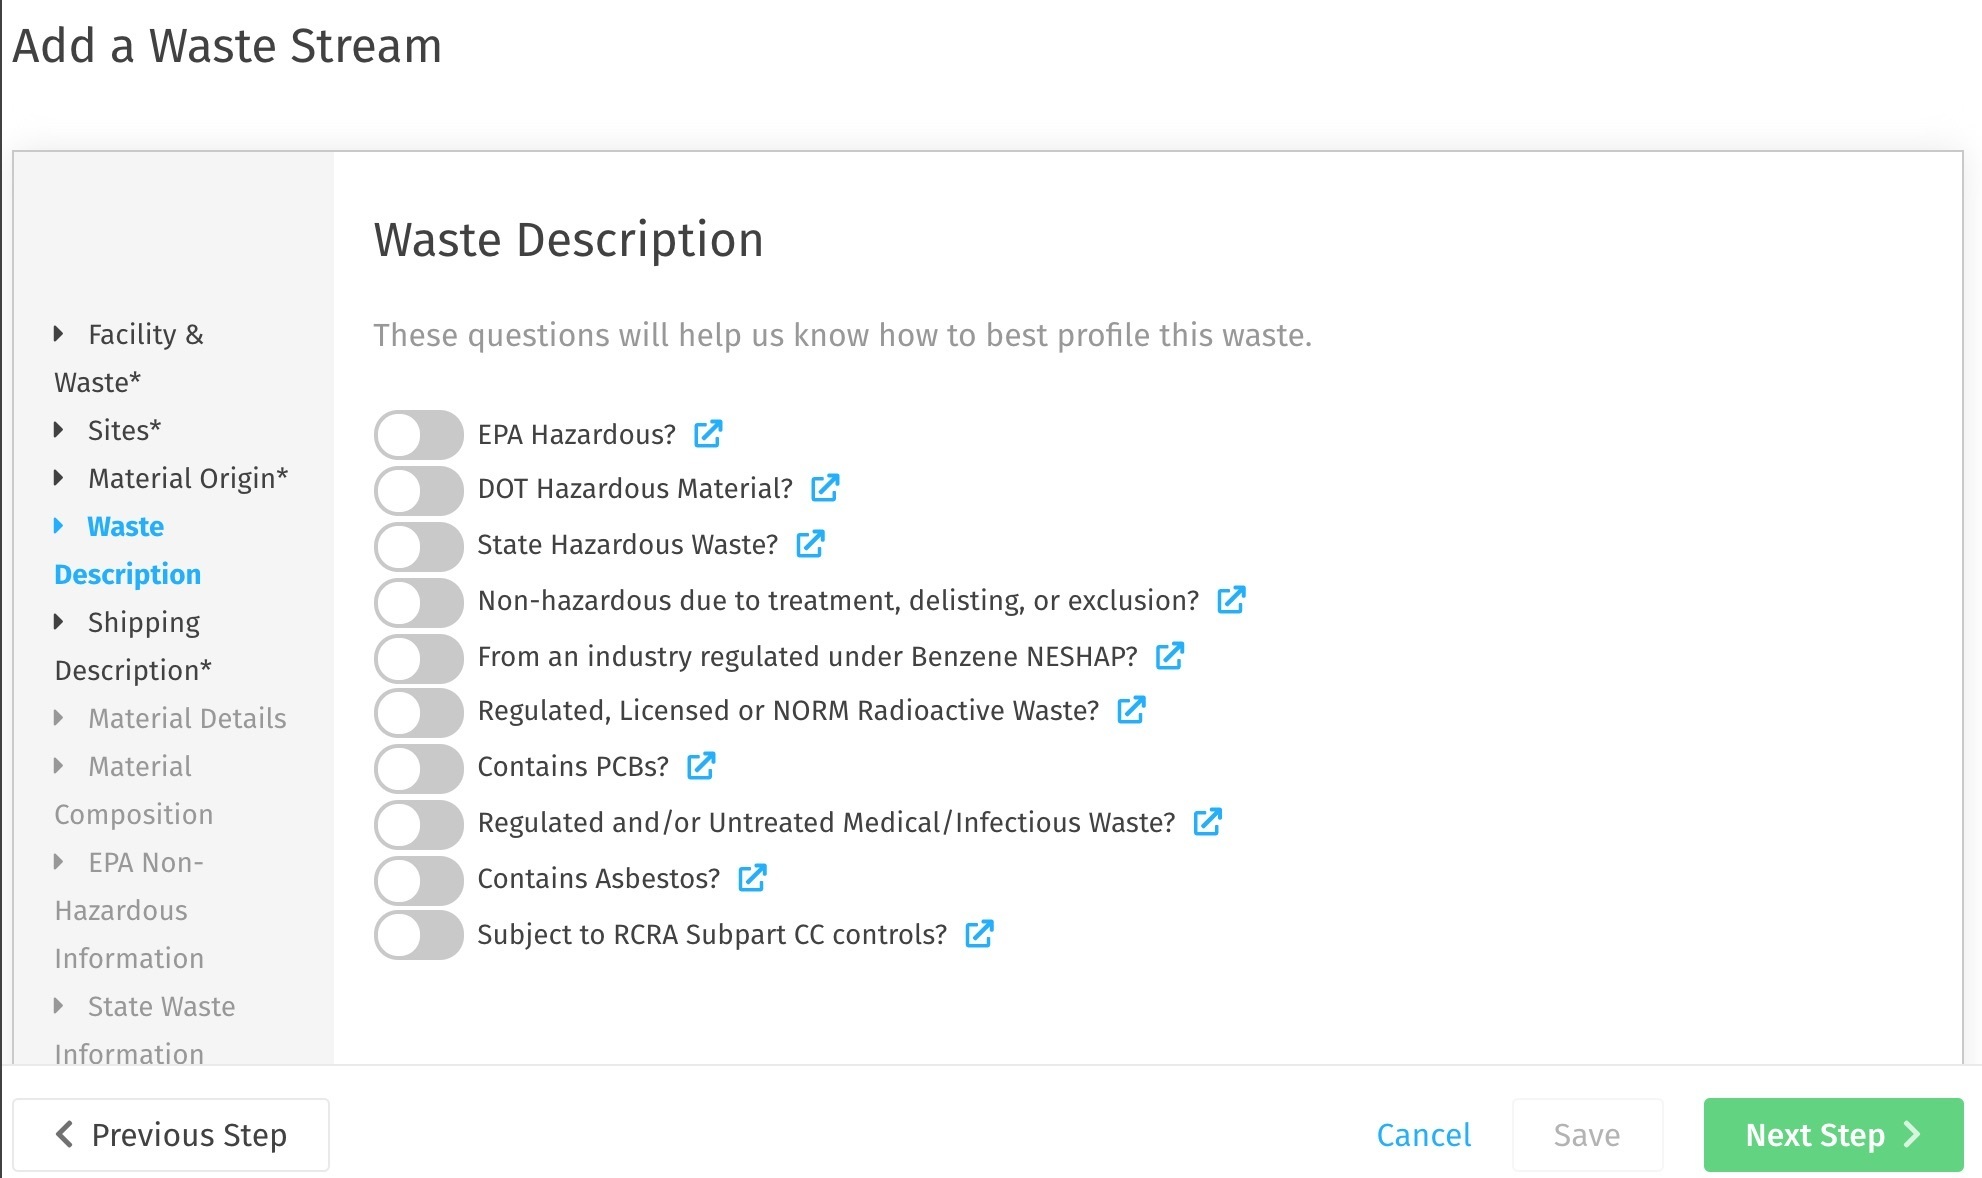
Enter Waste Description
Non-Profiled Waste Streams
For waste streams that do not require an approval (MSW and C&D) you will be able to answer a few simple questions and click Save. Required fields are indicated with an asterisk*. As you enter information, a Waste Stream Preview will complete that will show you how the data will appear on a manifest.

Profiled Waste Streams
For Waste Streams that do require an approval, you will see a Waste Stream builder form appear. As you toggle on selections on this screen, additional questions will appear. Required fields are indicated with an asterisk*. Complete the Waste Stream by answering all pertinent information on the following pages, then click Save.
The final step in creating a Waste Stream is to review and save your information. If there are any changes that need to be made before saving, you can click Previous Step to go back, or click on the sidebar to go directly to a specific section. Once you save, all companies on the Waste Stream will be able to see the draft.
Add Contacts to a Profiled Waste Stream
Once you have saved your Profiled Waste Stream, you may specify key Contact(s) from the existing users in the Generator, Service Provider, Transporter, and Billing Companies.
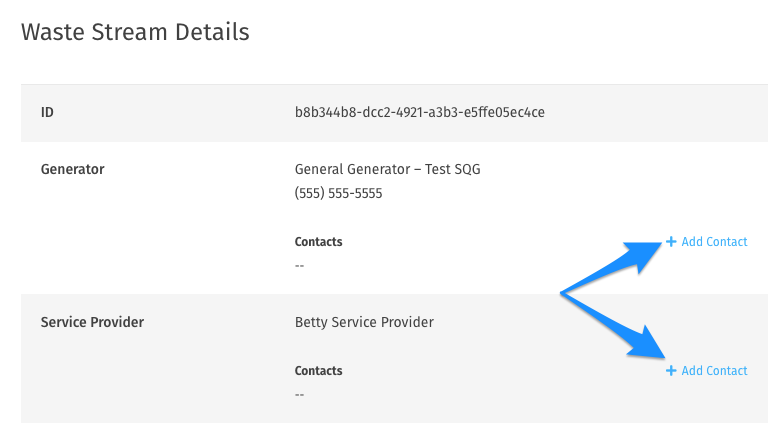
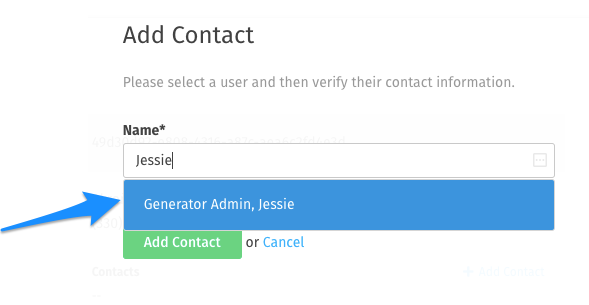
Click Add Contact then search in the box that appears for the existing user that you wish to add. If the user has specified a title or phone number in their Account Details, you will see that information here. You have the option to add a telephone number if it is missing. Click Add Contact to continue.
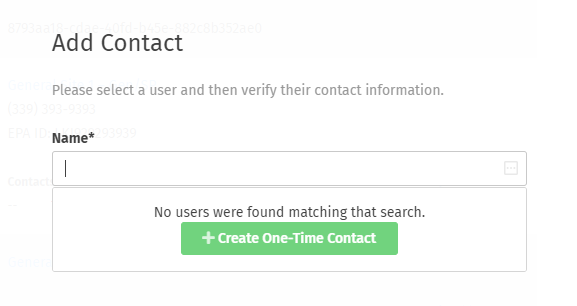
You may also choose to Create a One-Time Contact if the Contact you wish to add is not already a User in the system. Enter the Contact's details on the form that follows and click Add Contact to continue.
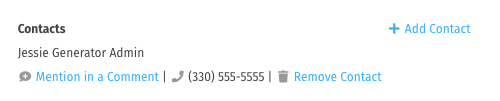
You will now see the contact listed on the Waste Stream and will have the option to remove the contact if they were added in error, or mention them in a comment.
Submit Profiled Waste Streams for Approval
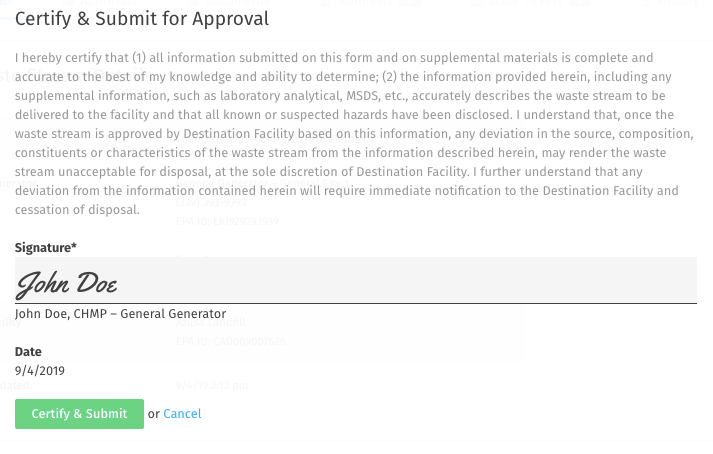
Once you have created your draft Profile, you can submit it to the Facility by clicking Certify and Submit.
Note: Once a Waste Stream has been approved, you will no longer be able to change any of the Companies or Sites on the Waste Stream.

A Certification box will appear for you to type your name, then submit the request for approval to the Facility.
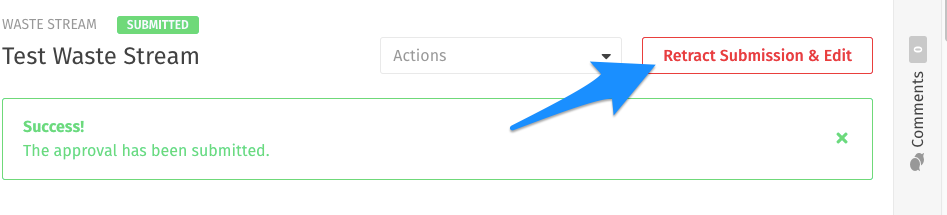
If you have submitted the Profiled Waste Stream in error, you may undo it by clicking Retract Submission and Edit.